
Welcome to this blog about using Owl.js with Odoo!
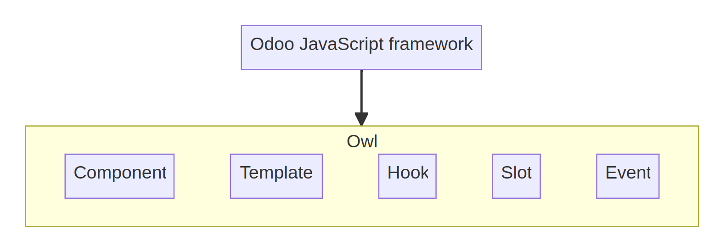
OWL is a new open-source Framework created internally at Odoo to be used as a replacement for the current old client-side technology used by Odoo. According to the repository description:
The Odoo Web Library (OWL) is a relatively small UI framework intended to be the basis for the Odoo Web Client in future versions (>15). Owl is a modern framework, written in Typescript, taking the best ideas from React and Vue simply and consistently.
It is based on the popular jQuery library and provides many useful features like DOM manipulation, event handling, and animation. Odoo, on the other hand, is a popular open-source ERP software used by many businesses for managing their operations.
In this blog, we will explore how to use Owl.js with Odoo to create custom UI components and enhance the user experience of your Odoo application.
Getting Started with Owl.js in Odoo
To get started with Owl.js in Odoo, you first need to include the library in your Odoo module. You can either download the Owl.js library and include it in your module directory, or you can use a CDN to include it in your module's XML file.
Here's an example of including Owl.js from a CDN:
XML :
<template>
  <script type="text/javascript" src="https://cdn.jsdelivr.net/npm/owljs@2.0.0/dist/owl.min.js"></script>
</template>
Once you have included Owl.js in your module, you can start using its features to create custom UI components.
Components
Components are JavaScript classes with properties, functions, and the ability to render themselves (Insert or Update themselves into the HTML Dom). Each Component has a template that represents its final HTML structure, with composition, we can call other components with their tag name inside our Component.
Creating Custom UI Components with Owl.js
Owl.js provides many useful features for creating custom UI components. Here are a few examples:
Creating a Modal Dialog
Modal dialogs are a common UI component used to display information or prompt the user for input. With Owl.js, you can easily create a modal dialog by using the Owl.Dialog class.
Here's an example of creating a simple modal dialog:
js :
var dialog = new Owl.Dialog({
title: 'My Dialog', content: '<p>Hello, World!</p>', buttons: [{ text: 'OK', callback: function() { alert('OK button clicked'); dialog.close(); } }] }); dialog.open();
This will create a modal dialog with the title "My Dialog", some content ("Hello, World!"), and an "OK" button that displays an alert when clicked.
Creating a Dropdown Menu
Dropdown menus are another common UI component used to provide navigation or options. With Owl.js, you can easily create a dropdown menu by using the Owl.Dropdown class.
Here's an example of creating a simple dropdown menu:
js :
var dropdown = new Owl.Dropdown({ trigger: '.my-button', content: '<ul><li>Item 1</li><li>Item 2</li><li>Item 3</li></ul>' });
This will create a dropdown menu that is triggered by clicking on an element with the class "my-button". The dropdown menu will display a list of three items.
Creating a Slider
Sliders are a popular UI component used for displaying images or other content in a slideshow format. With Owl.js, you can easily create a slider by using the Owl.Carousel class.
Here's an example of creating a simple slider:
js:
var slider = new Owl.Carousel({ items: 1, loop: true, autoplay: true, autoplayTimeout: 5000, nav: true, navText: ['<i class="fa fa-chevron-left"></i>', '<i class="fa fa-chevron-right"></i>'], dots: true });
This will create a slider with one item per slide that loops infinitely and autoplay with a five-second delay between slides. It also includes navigation arrows and dots, which can be styled using CSS.

Hooks and reactivity
In Owl JS, hooks and reactivity are used to manage the component state and to update the UI in response to changes in that state.
Here's an example of how to use hooks and reactivity in an Odoo application built with Owl:
javascript :

odoo.define('my_module.MyComponent', function(require) {
    'use strict';

    const { useState, useUpdateEffect } = owl.hooks;

    class MyComponent extends owl.Component {
        constructor() {
            super(...arguments);
            this.state = useState({ count: 0 });
        }

        incrementCount() {
            this.state.count += 1;
        }

        willUpdateProps(nextProps) {
            console.log('Props will update: ', nextProps);
        }

        willUnmount() {
            console.log('Component is unmounting');
        }

        render() {
            const { count } = this.state;
            return (
                <div>
                    <p>You clicked the button {count} times</p>
                    <button onClick={() => this.incrementCount()}>Click me</button>
                </div>
            );
        }
    }

    return MyComponent;
});
In this example, we import the useState and useUpdateEffect hooks from Owl. The useState hook is used to define a piece of state called count, which is initially set to 0.
The incrementCount method is used to update the count state when the button is clicked.
The willUpdateProps and willUnmount lifecycle methods are used to log messages to the console when the component is about to receive new props or is about to unmount.
Finally, the component returns some JSX that displays the current count and a button that triggers the incrementCount method.
By using hooks and reactivity in this way, changes to the count state will automatically trigger updates to the UI, ensuring that the component always displays the latest value of the count. The useUpdateEffect hook can also be used to perform side effects after the component has been updated.
Passing data from Parent to Child via props
In Owl JS, you can pass data from a parent component to a child component using props. Here's an example of how to pass data from a parent component to a child component using props:
Parent component (my_parent_component.js):
javascript :

odoo.define('my_module.my_parent_component', function (require) {
    "use strict";

    const { Component } = owl;

    class MyParentComponent extends Component {
        constructor() {
            super(...arguments);
            this.state = {
                myData: 'Hello, world!'
            };
        }
        render() {
            return <MyChildComponent myData={this.state.myData} />;
        }
    }

    return MyParentComponent;
});
Child component (my_child_component.js):
odoo.define('my_module.my_child_component', function (require) {
    "use strict";

    const { Component } = owl;

    class MyChildComponent extends Component {
        static props = ['myData'];

        render() {
            return <div>{this.props.myData}</div>;
        }
    }

    return MyChildComponent;
});
In this example, we have a parent component named MyParentComponent and a child component named MyChildComponent. The parent component has a myData state variable that contains the data we want to pass to the child component.
To pass this data to the child component, we use the props attribute in the child component's definition. We define a static props variable and include the name of the prop we want to receive (myData in this case).
In the parent component's render method, we include the child component and pass in the myData state variable as a prop. In the child component's render method, we display the data passed in from the parent component using this.props.myData.
With this setup, the child component can access the data passed in from the parent component using the props attribute. Whenever the parent component's state changes, the new data will be automatically passed down to the child component via props.

Registries
The Registry class is also a central component that provides a way to register and manage different types of objects, such as widgets, models, and services, that are used throughout the application.
The Registry class in Owl extends the core.Registry class from the @web/core/registry module. It adds some additional functionality specific to the Owl framework, such as the ability to automatically register components based on their XML definitions.
Here's an example of how you can use the Registry class in an Owl web application to register a new widget:
javascript:
import { Registry } from "@owl/owl"; import { Component } from "@owl/owl/dist/core/component"; class MyWidget extends Component { // Widget code here } const registry = new Registry(); registry.add("my_widget", MyWidget); // Get the registered widget const myWidget = registry.get("my_widget");
In this example, we first import the Registry class from the @owl/owl module and the Component class from the @owl/owl/dist/core/component module. We then define a new MyWidget class that extends the Component class and implements the functionality of our new widget.
Next, we create a new instance of the Registry class and use its add() method to register our new widget under the name "my_widget".
Finally, we use the get() method of the Registry class to retrieve the registered widget instance. We can now use the myWidget object to interact with our new widget in the rest of our application code.
Services
Services are used to encapsulate and share functionality that is not tied to a specific widget or view. Services are registered in the Registry and can be accessed by any widget or view in the application.
Here's an example of how to define a simple service in an Owl web application:
javascript:

import { serviceRegistry } from "@web/core/registry";
import { BaseService } from "@web/core/service";

class MyService extends BaseService {
    // Service code here
    doSomething() {
        console.log("Something was done!");
    }
}

serviceRegistry.add("my_service", new MyService());
In this example, we first import the serviceRegistry from the @web/core/registry module and the BaseService class from the @web/core/service module. We then define a new MyService class that extends the BaseService class and implements the functionality of our new service.
We define a doSomething() method that simply logs a message to the console.
Finally, we use the serviceRegistry.add() method to register our new service instance under the name "my_service".
Once the service is registered, we can access it from any widget or view in the application using the getService() method of the serviceRegistry, like this:
javascript:

import { Component } from "@owl/owl";
import { serviceRegistry } from "@web/core/registry";

class MyWidget extends Component {
    // Widget code here
    async myMethod() {
        const myService = await serviceRegistry.get("my_service");
        myService.doSomething();
    }
}
In this example, we first import the Component class from the @owl/owl module and the serviceRegistry from the @web/core/registry module.
We define a new MyWidget class that extends the Component class and implements a method called myMethod(). Inside this method, we use the serviceRegistry.get() method to retrieve the MyService instance that we registered earlier under the name "my_service". We can then call the doSomething() method on the service instance to execute its functionality.
Patching Code
Patching allows you to modify the behavior of existing classes, methods, or functions defined in the application without having to modify their original source code. This can be useful when you need to customize or extend the functionality of an existing component in the application.
To patch a component in an Owl web application, you can use the patch() method of the component's class. Here's an example:
javascript:
import { Component } from "@owl/owl"; class MyComponent extends Component { // Component code here myMethod() { console.log("MyComponent.myMethod() was called"); } } MyComponent.patch({ myMethod() { console.log("MyComponent.myMethod() was patched"); this._super(); } }); const myComponent = new MyComponent(); myComponent.myMethod();
In this example, we first import the Component class from the @owl/owl module and define a new MyComponent class that extends the Component class and implements a method called myMethod().
We then use the patch() method of the MyComponent class to patch the myMethod() method with a new implementation that logs a different message to the console and calls the original implementation using this._super().
Finally, we create a new instance of the MyComponent class and call its myMethod() method. The patched implementation of myMethod() is called, which logs a different message to the console and calls the original implementation using this._super().
Note that patching is a powerful feature that should be used with caution. It is generally recommended to use patching only as a last resort when there is no other way to achieve the required customization or extension of the application's functionality.
QWeb Templates
QWeb is a templating engine used in Odoo to generate HTML content dynamically. It is a simple and powerful template language that allows you to build complex and dynamic web pages.
QWeb templates are built using XML syntax and can be used to generate HTML, XML, and other text-based formats. They allow you to easily insert dynamic content and control the layout of your pages.
Here's an example of a simple QWeb template in Odoo:
XML :
<template id="my_template" inherit_id="website.layout">
  <t t-call="super"/>
  <div class="my-class">
    <h1>Hello, World!</h1>
    <p>This is my first QWeb template.</p>
  </div>
</template>
In this example, we define a new QWeb template with the ID my_template. We also specify that this template should inherit from the website.layout template using the inherit_id attribute. This allows us to override specific parts of the inherited template while keeping the rest of its structure and functionality.
Inside the template, we use the <t> tag to insert dynamic content. In this case, we use the t-call attribute to call the super() method of the inherited template, which will insert its content into our template. We then add a <div> tag with a class of my-class, and inside that, we add a <h1> tag and a <p> tag with some text content.
This is just a simple example, but QWeb templates can be used to build much more complex and dynamic web pages in Odoo.
Example for practice using OWL components, hooks, props, and events.
- Components: We defined two components: ProductListView and ProductListWidget, which are defined using the Component class and xml tags.
- Props: We passed the initial-products prop to the ProductListWidget component to initialize its state.
- Hooks: We used the useComponent hook to access the ProductListWidget instance in the ProductListView component.
- Events: We used the on method to listen to events triggered by the ProductListWidget component. When a product-clicked event is triggered, we handle it by calling the _onProductClicked method, and when an external-clicked event is triggered, we handle it by calling the _onExternalClicked method.
javascript : product_list_widget.js

odoo.define('my_module.ProductListWidget', function (require) {
    "use strict";

    const { Component, useState, useGetters } = owl;
    const { xml } = owl.tags;
    const { whenReady } = owl.utils;
    const { useExternalListener } = owl.hooks;

    class ProductListWidget extends Component {
        static template = xml`
            <div class="my-module-product-list-widget">
                <ul>
                    <li t-foreach="products" t-as="product" t-key="product.id">
                        <div class="o_product" t-att-data-product-id="product.id">
                            <div class="o_product_name">
                                <t t-esc="product.name"/>
                            </div>
                            <div class="o_product_price">
                                <t t-esc="product.list_price"/>
                            </div>
                        </div>
                    </li>
                </ul>
            </div>
        `;

        constructor() {
            super(...arguments);
            this.state = useState({
                products: [],
            });
            this.getters = useGetters();
        }

        mounted() {
            this._loadProducts();
        }

        _loadProducts() {
            return this.getters
                .rpc({
                    model: 'product.product',
                    method: 'search_read',
                    args: [[], ['name', 'list_price']],
                })
                .then((products) => {
                    this.state.products = products;
                });
        }

        _onProductClick(ev) {
            const productId = ev.currentTarget.dataset.productId;
            this.trigger('product-clicked', { productId });
        }

        _onExternalClick(ev) {
            if (!this.el.contains(ev.target)) {
                this.trigger('external-clicked');
            }
        }

        _setupExternalListener() {
            useExternalListener(window, 'click', this._onExternalClick.bind(this));
        }
    }

    ProductListWidget.props = {
        initialProducts: { type: Array, optional: true, default: [] },
    };

    return ProductListWidget;
});
In this example, we define a new component called ProductListWidget that displays a list of products. The component loads the list of products from the server using the rpc method provided by the useGetters hook.
The component also defines an event handler for when a product is clicked and triggers an event called product-clicked with the productId as the payload.
Additionally, the component defines a method called _setupExternalListener that uses the useExternalListener hook to attach an event listener to the window object for the click event. When the user clicks outside of the component, the component triggers an event called external-clicked.
To use this component, you can simply add it to any view like this:
xml: product_list_widget.xml
<template id="my_module_product_list_view"> <div class="my-module-product-list-view"> <ProductListWidget initial-products="[]" /> </div> </template>
javascript: product_list_view.js

odoo.define('my_module.ProductListView', function (require) {
    "use strict";

    const { Component } = owl;
    const { xml } = owl.tags;
    const { whenReady } = owl.utils;
    const { useComponent } = owl.hooks;

    const ProductListWidget = require('my_module.ProductListWidget');

    class ProductListView extends Component {
        static template = xml`
            <div class="my-module-product-list-view">
                <ProductListWidget initial-products="[]" />
            </div>
        `;

        constructor() {
            super(...arguments);
            this.productListWidget = useComponent('ProductListWidget');
        }

        mounted() {
            this.productListWidget.on('product-clicked', this._onProductClicked.bind(this));
            this.productListWidget.on('external-clicked', this._onExternalClicked.bind(this));
        }

        _onProductClicked(ev) {
            const productId = ev.detail.productId;
            // Handle product click
        }

        _onExternalClicked() {
            // Handle external click
        }
    }

    return ProductListView;
});
In this example, we define a new component called ProductListView that wraps the ProductListWidget component. The ProductListView component listens for events triggered by the ProductListWidget component and handles them accordingly.
To use the ProductListView component, you can simply add it to any view like this:
xml: product_list_view.xml
<template id="my_module_product_list_view">
<div class="my-module-product-list-view">
<ProductListView />
</div>
</template>
Note that you will need to make sure that the my_module.ProductListView and my_module.ProductListWidget modules are loaded in your Odoo instance.
python : __manifest__.py
{
'name': 'My Module',
'version': '1.0',
'category': 'Tools',
'summary': 'My Odoo module',
'depends': ['base', 'product'],
'data': [
'views/product_list_view.xml',
],
'qweb': [
'static/src/xml/product_list_widget.xml',
],
'js': [
'static/src/js/product_list_widget.js',
'static/src/js/product_list_view.js',
],
'application': True,
}